Ozon European Tour 2013

This past spring/summer has been a really interesting time for Ozon. There are more and more people attending to workshops. And bikes made in them are travelling around Europe.

Alex conquered Iceland. Atsuko and CharRie are somewhere in central Europe heading to Southern France. Their plan is to cycle and sell hand brewed coffee! Also, you can support the trip through CharRie’s Café.

Image

Atsuko and CharRie ready to start the European Coffee Bike Tour 2013.

No wonder Stefan and Dan are happy!

Image

Honey and bikes in the BLO-Ateliers

It’s another sunny July day at the office. Ozon workshop is located in the Blo-Atelier next to Nöldnerplatz, Berlin. There are about 30 or so artists ranging from bike manufacturers (other than Ozon) to fireartists. In the garden of Ozon there’s also 3 beehives that produce honey for the hungry citizens of Berlin.

So I give to you honey and a bike made in the Blo-Ateliers.

Image

Image

Image

Working with Bamboo #4 (How to build a Bike)

Finally!
The frame is ready. The parts are here! Now, just need to do some assembly work and sell my old bike!

The manufacturing process was completely new to me and there’s would be a lot to learn. However, I think I got the hang of it.

So the basics of building a bike are here:

Step #1

Choose the right frame geometry. For me this was simple. As I already have a MTB and a road bike I wanted to have something fast, smooth and simple. So my choise was a fixed gear track bike for city cruising and commuting.

One can successfully use basically any frame geometry. My frame is based on a certain track bike with slight alterations.

Step #2

Choose the frame material carbon-fiber, steel, aluminium or bamboo.

Every material has its own characters. Pros and cons. Titanium and carbon-fiber are superlight and  stiff. They are also super expensive and I would imagine that you would have to have special tools for them. Steel, on the other hand, is to some extend easy to work with and it is cheap. I’m not the most experienced welder, but I could imagine I could have pulled it off. The down sides of steel are that it is quite heavy and surprisingy flexible. Aluminium is like steel only lighter and harder to handle.

To my complete surprise bamboo is the easiest material to work with. One would still need to be working accurately and carefully but other than drilling, sawing, glueing, and sanding there are no special skills/tools required. Of course, some techniques are better than others but in the end it is quite simple. Especially when compared to other materials mentioned above.

Step #3

The actual building process.

After planning there’s the actual building process. Sawing the bamboo rods to correct length, preparing the joints, sanding, glueing, sanding more, finishing, painting, clear coating. Simple, right.

Step #4

Accuire the other parts

Purchase new or second hand, rent, get donations; whatever suits for you budjet. But absolutely no stealing!

For the most part, I purchased my parts from CNC Bikes but there’s a abundance of bike parts stores. [I want to comment that CNC has really good deals for Focus forks!] I wanted to get the parts from one store to get it hassle free. (Of course it wasn’t totally without problems, but they were courtesy of the delivery service and typos on my part.)

In this project I could not spend too much money on the parts so I had to compromise. It was a case of  money over aesthetics. I can upgrade the parts along the way, when my financial situation gets better. Right now the most important thing is to get the bike on the road.

So here’s the list of the parts:

Syncros FR Factory Steuersatz Edelstahl 1 1/8″
Lenker NC-17 Freeride CC2 Freeride/XC Riser 25,4/640 mm schwarz
Focus Road Straight Vollcarbon Gabel  1 1/8″ UD
Salt BMX Bremshebel rechts einzeln  schwarz
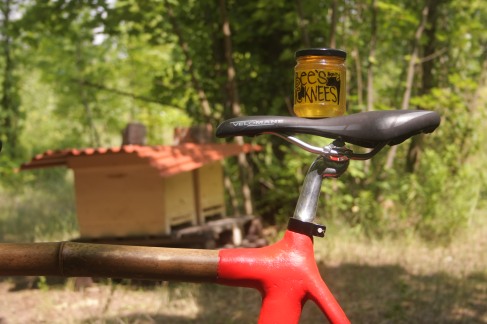
Velo O-Zone Race Sattel schwarz
CNC Bahn SB Fix/Free Laufradsatz /CN 424/CNC HP 600 silber
Selcof Aero Sattelstütze 27,2x230mm -Montagespuren-
CNC Touring Vorbau 25.4/115mm silber-poliert
NC-17 CR44-Kunststoff Pro Pedale schwarz
2 x Continental Cross Schlauch 28″ 25/35 SV 42mm  unverpackt
2 x Continental Super Sport Plus 28-622 schwarz
Miche Primato Innenlager BSA 107 mm
Felt BMX Griffe schwarz
Zoom Ahead Vorbau 25,4mm/90 mm/7°
Shimano Tiagra BR-4600 Vorderradbremse einzeln
Sram PC-1 Nickel Singlespeed Kette

[And, yes, I’m still missing some parts and I got two vorbaus.]

Step #5 & #6

Assembly. Ride

As the parts are sitting in a cardboard box on my living room floor I have not much to say on these.

However, if your happen to do a workshop at Ozon. Don’t bring the greasy parts upstairs… 😉

-J.

Cycling and recyling at DMY Berlin

First of all, sorry for the long pause in blogging.

My bike is almost done. Just a little bit of sanding, painting and buying parts! Should be done during next week. Or one after that. I’ll be posting more on this.

DMY is an “International design festival” in Berlin. There’s a wide variety of design artifacts but the thing that surprised me was the abundance of bikes and recycled bike parts. So, here’s a quick run-through of cycling at DMY.

FeraBikes is a polish (Poland, by the way, was this years theme country) bamboo bike manufacturer. They have a really good looking product! They use different and more conservative method of sealing the joints. Like Ozon, Fera seems to pay a lot of time and effort to the details and finishing.

Image

In addition to bamboo bikes FeraBikes also uses traditional materials.

Another bamboo project was Lodiboo by Florian Tolksdorf. Lodiboo is a “long-distance bike for one person and luggage”. Highly interesting part was the use of bend bamboo which apparently was not bend but grown into the shape necessary. Tolksdorf used pipe clamps to secure the joints for easy repairs. Potentially this could be very efficient and ecological mean of transportation. I wonder what would happen if one would combine the technology used in Boosted Boards and Lodiboo!

Image

Althoug still at early stages (?) of development Lodiboo seems like an interesting idea!

3D-printing is here for bikes (well I guess it has been for a while, but this is the first time I saw one). Designed by Stanislaw Juszczak “Let’s sprint” is basically a futuristic looking track bike.

3D-printing is making a big impact in the aerodynamics of bikes. Will, for example, all pro tour teams use a 3D-printed bike in five years?

Image

Image

Image

Image

Image

Image

Electric bikes or e-bikes are often seen as the next big thing of biking industry. Well, why not. For a commuter this may be an answer to sweaty mornings.

Smart were offering test bikes to the DMY-visitors (actually since they are located outside the entrance you don’t even have to buy a ticket to test drive). The smartbike surprised me positively. The people at Smart have really done their work properly and they have taken the ebike consept long ways of the early models. Motor is completely silent, really efficient and helpfull. But I don’t want to seem too excited as there are still many things that needs improving. Specially the weight 26.1 kg (the battery is 3.3 kg). The price tag is also quite hefty: almot 2900€.

IMG_2786

The control panel is clear and easy to read. However the controls in handle bar were somewhat flimsy.

The control panel is clear and easy to read. However the controls in handle bar were somewhat flimsy.

IMG_2788

In addition to bike there was a lot recycled bike parts used in furniture.

IMG_2770
IMG_2771
IMG_2772
IMG_2773
IMG_2775
IMG_2776
The bike rack was designed by Onni Aho and Tuomas Orispää students in Lahti design school in Finland. The bike is a Pelago bike also made in Finland.
The last but not least there were the Canyon road and TT bikes. [I’m really and terrible sorry about the poor picture quality.]
IMG_2779
IMG_2781
That’s all for now. As I said, there will be more posting about the progress of my own bike project.
-J.

The Capitol City of Broken Glass (and Tacks)

As the Friday cruise was fun and refreshing, todays ride was not. I had my 5th flat tyre in Berlin. In a two-and-a-half-months.

Berlin is a nice city to cycle in but unfortunately there is a lot of broken glass around the city. Today, however, the deflator of the day was a tack-button from G-star jeans.  Somehow it managed to fell of the jeans, land on to a streeta and mutilate my back tire.

Other than the flat tire, I had really good luck with the weather. It has been pouring down water for the last couple of days. Somehow I managed to bike from Prenzlauer Berg to Blo Ateliers and back with out getting wet.

-J.

IMG_2601

IMG_2603

IMG_2605

IMG_2606


-J.

Biking through Berlin

Since there’s usually a workshop at Ozon during weekends, Fridays are reserved for shopping for materials needed. As we were few drop-outs too short, Stefan and I hopped on to our bikes and went for a ride. We took few wrong turns and poor decisions and ended up riding for 90 minutes across eastern Berlin. I managed to take few pictures to pin point our location. But I was still hopelessly lost basically the whole way! Luckily there are good maps on the bus stops of Berlin and thank goodness for smart phones with Google Maps! Otherwise I might still be out there. (I have below avarage sense of direction)

So the are the confirmed locations:

  • Blo Ateliers
  • the corner of Liepnitzstraße and Ehrlichstraße
  • the corner of Hainstraße and Schnellerstraße
  • Berlin-Schöneweide Pbf
  • Treptower Park
  • Eisenbrücke
  • Ostkreuz
  • Blo Ateliers

The route between them is unknown,  your guess is as good as mine. But the ride in itself was really nice. Especially after the first stop when I finally got a chance to pump my tires to normal pressures. Definately it was the longest ride I taken since moving to Berlin.

So here’s the pictures. Sorry for the bad quality; we did not stop to take the photos.

IMG_2566

A bus stop map was a lifesaver. Stefan is tracking down our route, I guess.

IMG_2568

Somewhere nearish of Totem Bikes.

IMG_2569

IMG_2571

Just before this, there was a really nice view over Spree and a university. So as we were riding, I tried to reach over the fence blocking the view, and this was my result. Fine picture of, well, dirt.

IMG_2572

Stefan setting the pace.

IMG_2573

I can assure you there would have been better views of the Spree.

IMG_2574

Getting to the right direction at least.

IMG_2579

Treptower Park and ominous clouds.

IMG_2581

A boat shop for epoxy.

IMG_2583

Almost back at the office.

-J.

Working with Bamboo #1

This is the first post regarding to my own bike building project. I’ll be posting more and regularly on this.

I’ve finally finished the first crucial steps on my own project. I’ve chosen the right pieces of bamboo rod and frame geometry, sawed everything to the measure, drilled, and sanded. Finally, I’ve glued everything together. Now, the bike is off of the jig and it’s ready for further working.

The first – and to me at least the highly important one – step is choosing the bamboo rods for the frame. For my top tube, I chose one with a slight bend on it to have a little curve. Also, I wanted to pick one with as solid natural pattern of bamboo as possible. It’ll be darkish brown frame with some lighter spots.

In addition to the curves and patterns another thing is to have the bamboo wide enough. For a safe frame the rod needs to be about 40 mm in diameter. The wider the bamboo is the stiffer the frame will be. Some builders like to use a really wide down tube (80mm and up), but I chose to build everything from the same rod. Another safety issue is that the bamboo must not have any cracks in it. You wouldn’t use rusted steel for your frames either.

The next phases were sawing and sanding. With accurate measures and a good quality japanese saw this was just a quick step. Sanding. That was another deal. Naturally there’s sort of glossy and waxy outer layer in bamboo. To form secure joints that needs to be sanded off. All of it. Sounded like another walk in the park. I’m so greatful to have modern tools, but still it took me quite a while to have a nicely sanded surface.

After preparing the few metal parts (i.e. bottom braket) everything was prepared for the assembly of the bike. Once every part was set up on the jig I could start the glueing process. This is the most time consuming part of the whole building process. Well glueing must be done quite rapidly as there’s only about 20 minutes to work with each patch of epoxy. But it takes hours to dry properly. The positive thing is that after the first layer I could remove the frame from the jig and start to make some real progress.

So in conclusion, my bike is now assembled, off the jig, and ready for the next round of work. Which will mostly include glueing and sanding. There’s still a lot of work to do before finished bike.

-J.

IMG_2398

Excluding the materials used for the joints this is everything that it takes to build a bamboo frame.

IMG_2390

Curved top tube and drop-outs.

IMG_2395

I really like these drop-outs.

IMG_2391

The jig

IMG_2399

All set to go.

IMG_2402

IMG_2404

IMG_2407

The frame is taking shape.

IMG_2471

Every step needs to be filmed.

IMG_2477

Another angle to the geometry. The smaller bamboo rods support the frame while applying the first layer of epoxy.

IMG_2480

First layer of epoxy.

IMG_2483

Stefan making final adjustments using a precision tool.